Protect Word Doc With Password

Securing sensitive information is a critical aspect of digital document management, and password protection is one of the most common methods to ensure confidentiality. This article will guide you through the process of protecting a Word document with a password, offering a comprehensive step-by-step tutorial, and exploring the various features and considerations associated with this security measure. Whether you're a student, a professional, or a business owner, understanding how to secure your Word documents is an essential skill in today's digital landscape.
Step-by-Step Guide: Password-Protecting Your Word Document

Protecting your Word document with a password is a straightforward process, ensuring that only authorized individuals can access and modify the content. Here’s a detailed guide to help you through the process:
Step 1: Open Your Word Document
Begin by opening the Word document you wish to secure. If you’re creating a new document, start by drafting the content as you normally would. For existing documents, simply locate and open the file on your device.
Step 2: Navigate to the “File” Menu
Once your document is open, click on the “File” menu located in the upper-left corner of the Word interface. This menu provides various options for managing your document, including printing, sharing, and, of course, securing it with a password.
Step 3: Select “Info” and Then “Protect Document”
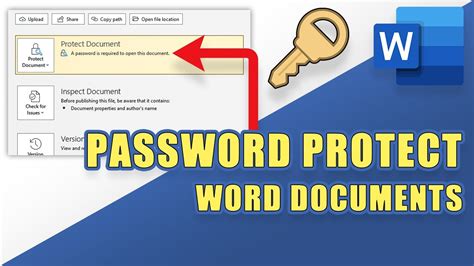
Within the “File” menu, you’ll find several tabs. Navigate to the “Info” tab, and you’ll see various options related to the document’s metadata and security. Click on “Protect Document” to reveal a dropdown menu with password protection options.
Step 4: Choose “Encrypt with Password”
From the “Protect Document” dropdown menu, select “Encrypt with Password”. This option allows you to set a password that will be required to open the document. It’s important to note that this feature encrypts the entire document, ensuring comprehensive security.
Step 5: Set Your Password
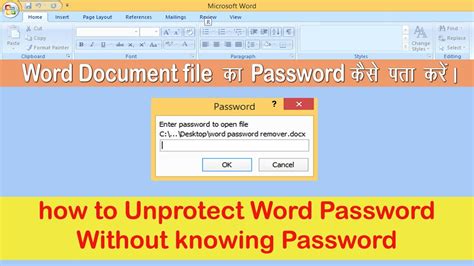
After selecting “Encrypt with Password”, a dialog box will appear prompting you to enter a password. Enter your chosen password and click “OK”. It’s crucial to choose a strong password that combines uppercase and lowercase letters, numbers, and special characters. The longer and more complex your password, the stronger the security.
Step 6: Confirm Your Password
Word will ask you to confirm your password to ensure accuracy. Enter your password again and click “OK”. This confirmation step is essential to avoid any potential errors or misspellings that could lock you out of your own document.
Step 7: Save Your Document
With your password set, it’s time to save your document. Click on the “File” menu again and select “Save As”. Choose a location to save your document and give it a name. It’s recommended to use a different name than the original document to avoid overwriting it accidentally. Click “Save” to finalize the process.
Step 8: Test Your Password Protection
To ensure your password protection is working as intended, close the document and reopen it. When prompted, enter your password. If you’ve set up the protection correctly, the document will open only after you enter the correct password.
Advanced Password Protection Features

While the basic password protection method is effective, Word offers additional features to enhance security. Here are some advanced options to consider:
Encrypting with a Digital Certificate
Word allows you to encrypt your document with a digital certificate, providing an even higher level of security. To do this, navigate to the “File” menu, select “Info”, and then “Protect Document”. Choose “Encrypt with Digital Certificate” and follow the prompts to select or create a digital certificate. This feature ensures that only individuals with the correct certificate can access the document.
Restricting Editing
In addition to password protection, Word offers the ability to restrict editing. This feature allows you to control who can make changes to your document. To enable this, go to the “Review” tab, click on “Protect”, and then select “Restrict Editing”. You can choose to allow only certain individuals to edit the document or restrict all editing except for specific sections.
Marking a Document as Final
If you want to share a document but don’t want others to make any changes, you can mark it as final. This feature disables all editing capabilities, ensuring that the document remains unchanged. To mark a document as final, go to the “File” menu, select “Info”, and then click on “Protect Document”. Choose “Mark as Final” to apply this setting.
Performance Analysis and Comparison
When it comes to password protection, Word’s performance is generally reliable and secure. However, it’s important to note that the effectiveness of your protection depends on the strength of your chosen password. Weak passwords can be cracked, so it’s essential to choose a robust and unique password.
In terms of comparison, Word's password protection features are similar to those offered by other popular word processing software, such as Google Docs and Apple Pages. All of these applications provide basic password protection and additional security options to cater to different user needs.
| Word Processing Software | Password Protection Features |
|---|---|
| Microsoft Word | Encrypt with Password, Digital Certificate Encryption, Restrict Editing, Mark as Final |
| Google Docs | Password Protection, Permission Settings |
| Apple Pages | Password Protection, Lock Document |

While each software offers its own set of features, Word's comprehensive security options and its integration with the Microsoft Office suite make it a popular choice for businesses and professionals.
Future Implications and Best Practices
As technology advances, so do the methods used to compromise digital security. Here are some future implications and best practices to consider when protecting your Word documents with passwords:
Regularly Update Your Passwords
It’s essential to update your passwords regularly to stay ahead of potential threats. Consider changing your passwords every few months or whenever there’s a significant security update or breach. This practice ensures that even if your password is compromised, it remains secure for a limited time.
Use Multi-Factor Authentication
Multi-factor authentication (MFA) adds an extra layer of security by requiring multiple forms of identification to access your document. This could include a password, a physical token, or a biometric identifier like a fingerprint. Enabling MFA significantly reduces the risk of unauthorized access.
Educate Yourself on Security Best Practices
Stay informed about the latest security threats and best practices. Regularly review security guidelines and consider implementing additional security measures, such as antivirus software and firewall protection. By staying vigilant, you can ensure that your documents remain secure even as new threats emerge.
Back Up Your Documents
While password protection is an effective security measure, it’s always wise to have a backup plan. Regularly back up your documents to a secure cloud storage service or an external hard drive. This ensures that even if your primary copy is compromised or lost, you still have access to your important information.
Avoid Using Public Wi-Fi for Sensitive Work
Public Wi-Fi networks can be insecure, making them a potential vulnerability for your sensitive documents. Avoid accessing or working on password-protected documents while connected to public Wi-Fi. Instead, use a secure, private network or consider using a virtual private network (VPN) to encrypt your internet connection.
Regularly Audit Your Security Settings
Periodically review your security settings to ensure they’re up to date and aligned with your current needs. As your work or personal circumstances change, so might your security requirements. Stay proactive by regularly auditing your security measures and making adjustments as necessary.
Conclusion

Protecting your Word documents with passwords is a fundamental step towards securing your sensitive information. By following the step-by-step guide provided and implementing the advanced features and best practices discussed, you can ensure that your documents remain safe and accessible only to authorized individuals. Remember, security is an ongoing process, and staying vigilant is key to maintaining a secure digital environment.
How strong should my password be for optimal security?
+A strong password typically consists of a combination of uppercase and lowercase letters, numbers, and special characters. It should be at least 8 characters long, but longer passwords offer better security. Avoid using easily guessable information like your name, birthdate, or common words. Consider using a password manager to generate and store complex passwords.
Can I remove the password protection from my document if I no longer need it?
+Yes, you can remove password protection from your Word document. To do this, open the document, go to the “File” menu, select “Info,” and then click on “Protect Document.” Choose “Encrypt with Password” and then click on “Remove Password.” This will remove the password protection, allowing you to open the document without entering a password.
What happens if I forget my password?
+If you forget your password, there’s no way to retrieve it directly from Word. However, if you’ve backed up your document, you can try opening the backup copy and resetting the password. Alternatively, if you’ve stored your password in a password manager or written it down, you can refer to those sources. If all else fails, you may need to create a new document and start over.


